System requirements
Glossary of Terms
How to use the program
Beginners
(Please read)Output image settings (image size, resolution, alignment marks, type, arrangement)
How to use the program:
Output image settings

Set in Width of output image or Height of output image necessary size of output image. Values are in centimetres. Width and Height values change in proportion. Set in Print resolution, dpi necessary resolution of output image.
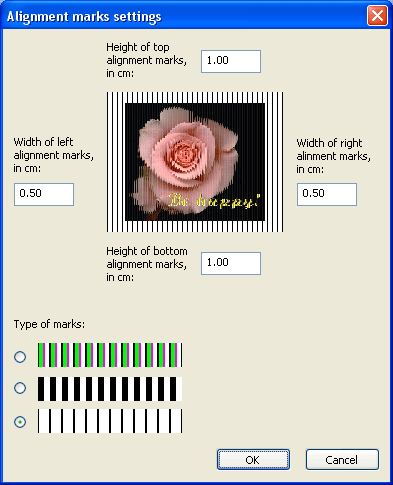
Alignment marks - turns off and turns on the alignment mark. Click Marks size... to open dialogue Alignment marks settings. Here you can change the sizes of alignment marks:
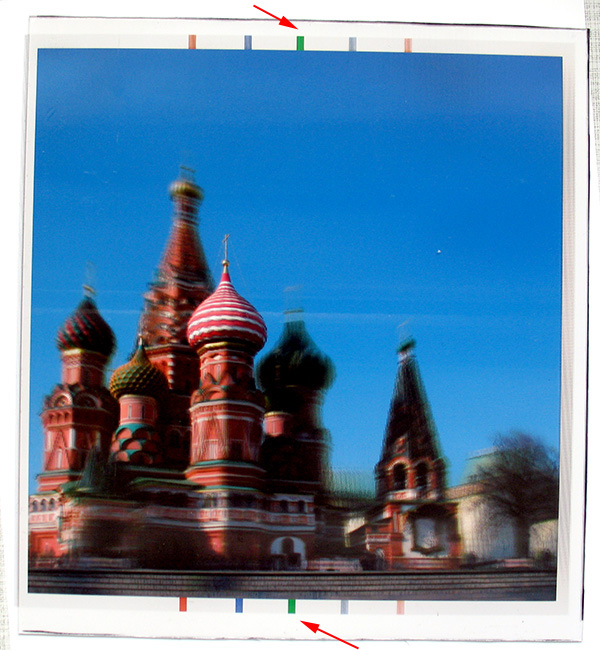
Special coloured spots are used for exact alignment the lenticular sheet and interlaced print. Look at the center of the picture and move the lenticular sheet to get the symmetrical coloured spots:
Click Nesting... to open this dialogue:
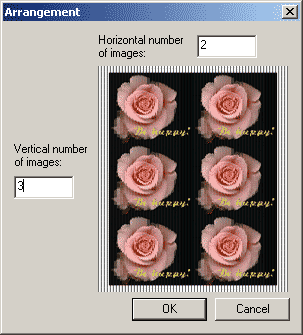
Here you can set the number of images by vertical and horizontal. You can print several images on the same sheet simultaneously and then cut them. Remember, Width of output image and Height of output image are sizes of single image.
In the drop-down list
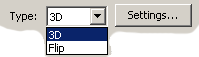
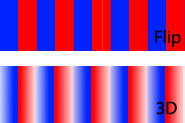
choose a necessary type of interlaced image: 3D is for stereo images creation, Flip is for stereo and flip images creation. Click Settings... to open the settings dialogue.
Flip algorithm makes a simple interlacing. The 3D algorithm changes the intensity inside the image data strips such that the edges of each strip is more pale and their centres are brighter as in this example:
Distance between views changes the width of the pale edges. When Distance between views=0 the pale edges are wider. These pale edges decrease the ghosting images.